After finish the basic form of aqua tower in project, I`m going to improve the model with some details. In addition, I will select a surface to analysis sunlight. Finally, I`m trying to adjust parameter to obtain the ideal area of balcony which will influences the final form also.
Part 1. Improving detail
There are three parts I`m going to create, floor, railing and interior mass.
Floor and railing are derived from the parameter I created before, the enclosed curve. I extrude them -0.5m and 1.2m separately, and cap the"-0.5" to make it a solid floor.
Besides, on the 52nd floors which is a 2 floor high level and there is not a railing on the roof. So I used"replace item" battery to take the parameter out on 53rd level and roof. Finally, I attached glass to railing and concrete to floor. Interior mass is easy to be created, just using the former"60*30" dimension to get a mass. This mass will intersecting with floor and railing and the final form shows up.
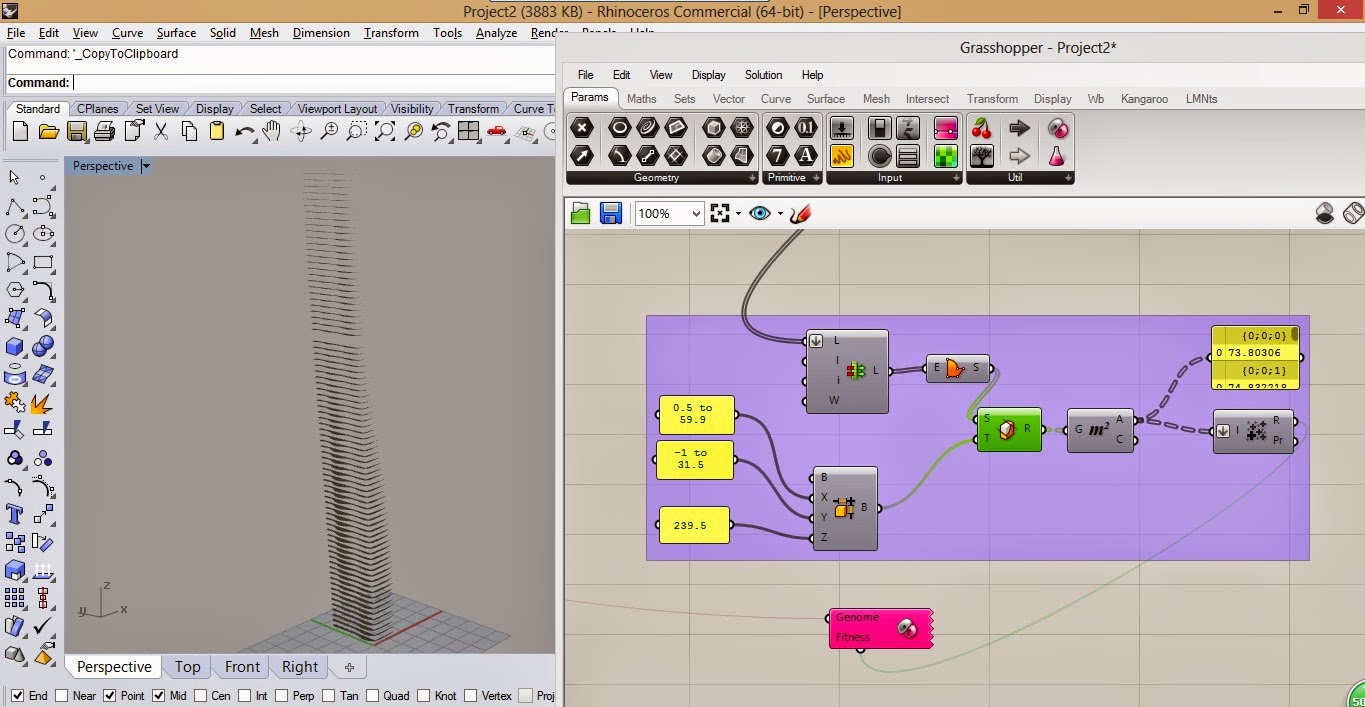
Part 2 Set a specific total area of balcony and enabling real area to meat that area.
Firstly, I need to get the balcony area which used "trim solid"
Then, I use the total area of real balcony subtracting ideal area and finally getting a absolute number. What I need to do is to minimize that the number close to 0.
After calculation, I got the diagram bellow.
After 53 times calculation, I found the optimal solution when parameter is 0.778. So I use this number to be my final parameter which will inputs into further calculation
Part 3 Analyzing surface sunlight
What I have done is using "list item" to pick one curve surface and analyse its sunlight condition.
This is the result.
Vedio link : http://youtu.be/HHxawO7OS3A
Monday, November 3, 2014
Project 1: Parametric design of Aqua Tower, Chicago. 1. Case study: Aqua Tower is a apartment building designed by studio Gang. It`s a mixed-use residential tower
From the picture, we can see this is a "skin" architecture, which means it is designed by two parts, one is the core box, the other one is the skin covering the box. Therefore, I am going to create the box, and use that box to create outside surface. 2. Create model. Firstly, I created this main volume. I am trying to get surface from this main volume.
And then I was thinking is that possible if I create a exploding surface and editing that surface to obtain curve surface. So I exploded the main volume to get surface in order to edit it later.
After getting the exploding surface, I found out that it is hard to define different floors and hard to connect these 4 exploded surfaces. Therefore I assume I might thinking how to create each layer first rather than whole volume.
Second time, I used the dimension of core box to create the base floor.
Using number series to repeat one floor into eighty.
I try to put "core box" and “80 floor" together. However, I found out even I get each floor and whole volume, still hard to change floor`s shape.
So I searched online how to edit several rectangular shape in a order. I found the link showing below. There is a same case study as mine, but his logic is much more clear than mine, and the method is also ease to control.
I am trying to understand and learn how he thinking this project.
His main logic is start from 3D view, make it to 2D, and finally find control point on 2D plane.
Same as mine, creating the core volume first (the dimension is vary from the research).
Secondly he created "floor" part and divided into two group, one is base floor and the other is upper floors. ( I didn`t think about creating two groups of floor)
From my understanding, the changing of the floor shape only happens between different floors.
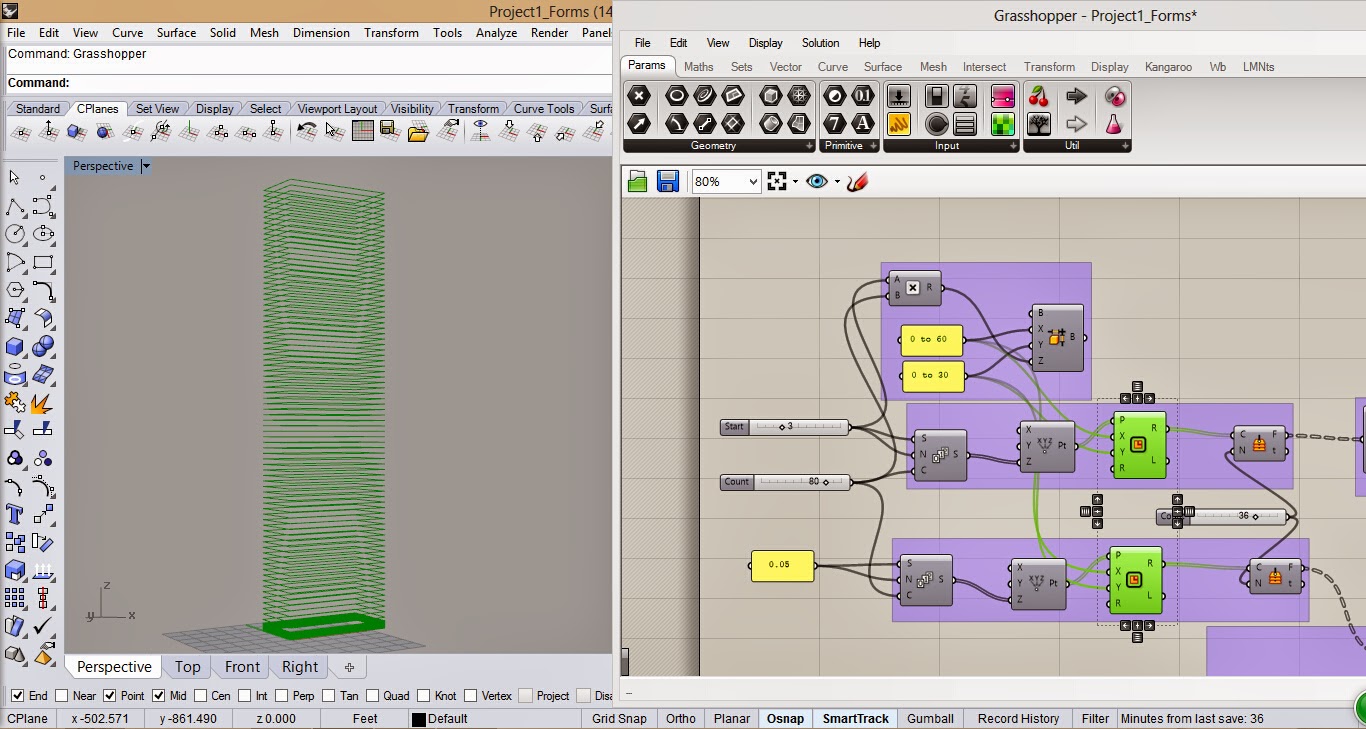
Creating several planes in each floor and using those planes centroid to change the shape of floor. I deconstructing those planes and obtain their original points. Those points will be interfered in later step. However, I think he did not create enough plane point to make shape highly closed. So I reset ted the number of control point to make it highly closed.
Meanwhile, creating a base floor by using same method. Later on applying base floor to interfere the upper points.
Next step, it is the most vital step, creating interfered parameter, but it needed a plug in to achieve, perlin noise, to evaluate. Perlin noise is function for generating coherent, smooth noise over a distance. Coherent noise means that for any two points in a distance, the value of the noise function changes smoothly as you move from one point to the other, as there are no discontinuities.
However, the time of data being evaluated is not enough, and remapping those data with a new domain and setting a minimum value for it. Finally outputting this parameter and combine with the vector of Y axis, which come from center point of each small plane in each level. Thus, the length of Y axis` vector varied in a certain domain. Then connecting same level`s point into a closed curve.
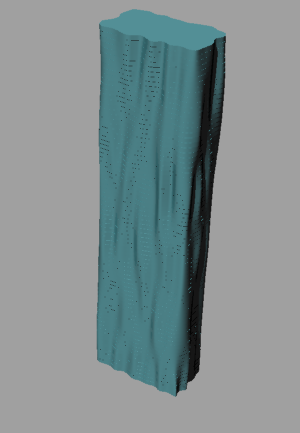
I extrude 80 level`s curves with 3 meters, floor height.
Skin is being built, what I need to do is to cap it, making each level to become a solid mass.
Shortage of this case study: Did not create a closely enough shape of model.(For example there is no interception between floor and interior window, the floor`s shape is far different from real one.) In addition, I assume maybe the shape of each floor can be designed by sunlight situation, or balcony`s area which should fulfill each floor`s requirement.
Advantage: his logic is really clear. From my opinion, his thinking is started from "Perlin Noise" and design this project reversely.
Changing parameter (scale coefficient) to see the changing


2NZFHHYDH3%40%7BB8(1.jpg)
M%606%5BIWZ%7B2_0EKF24%2476%5DV2.jpg)


H((VSJ6.png)
1.png)